- Gateway Middle School
- Make It Mondays
Pace, Katherine
Page Navigation
-
Welcome to Make It Mondays
Updated for Monday April 20, 2020
Watch the Make It Mondays tab every week for fun new DIY projects you can do with your family. You can "make it" any day of the week, but new ideas will be posted on Mondays. With each activity, students can focus on a variety of communication strategies, depending on individual goals and skills levels. Here are some ideas that may help:
- Artcitulation Students--If you are practicing speech sounds, make a vocabulary list of words you have read in the instructions or that have come up in conversation as you complete each project. After you have completed the list, highlight at least 10 words from that last that have your speech sound in the word. Make a unique sentence for each highlighted word and practice reading your sentences outloud, paying close attention to your speech sounds. If you would like to share your vocabulary list with me, I would love to see them. You may send your list and/or your sentences to me at kpace@everettsd.org
- Language Students--Follow all of the directions carefully. Make sure you have reviewed all of the directions before beginning the project, then carefully complete each step, in sequence. Once you have completed the project, summarize each step in your own words. You may complete your own summary in writing, or you may provide your summary out loud to an adult. As you complete your summary (out loud or in writing) focus on making a clear, concise and organized set of directions. If you complete your summary in writing, you may share it with me by sending an email to kpace@everettsd.org.
- Fluency Students--Once you have completed the project, describe each step of the project to an adult, concentrating on using clear, smooth speech. If it is easier to maintain clear speech while reading, you may write a short summary of the project and read your summary to an adult, concentrating on using a clear, smooth reading voice.
- Social Language Skills Students--These activities can be done with your family and are a great way to practice some of the skills we have practiced in social communication such as: Total Body Listening, Turn Taking, Eye Contact, Staying on the Subject, Following Directions, Body Language, and Tone of Voice.
- Extended Resource Room Students--These projects are intended to be fun and simple. You are encouraged to have adult supervision and support when completing these activities so that you are able to follow directions carefully and complete the projects successfully.
- Life Skills Students--We have done several of these projects in the Life Skills classroom and thought they might be fun to try at home. You may find that you need to adapt the steps to meet your child's needs. For some of the projects I will include simple communication boards that you can print at home to help promote communication skills throughout the project.
- ALL STUDENTS--if you have any questions about any of these projects or would like suggestions for applying these activities to the needs of your specific student, feel free to contact me via email to share thoughts and ideas at kpace@everettsd.org.
Week of May 4, 2020
This week's Make-It-Monday is another stress reliever. Prepare to make a galaxy jar that is out of this world. If you have access to the materials, this is colorful activity that creates an oddly satisfying visual sensation. To make your Galaxy jar, you will need:
1 glass jar with a lid
cotton balls (lots and lots of cotton balls)
acrylic tempera paint-at least two contrasting colors
water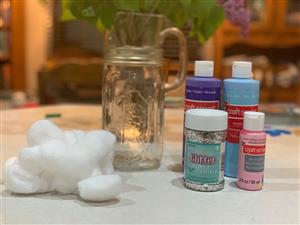
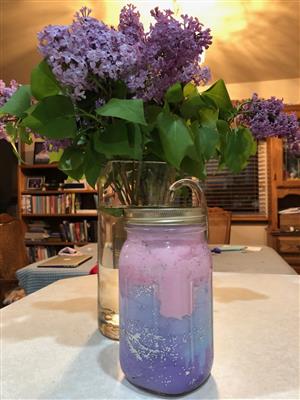
Now the fun begins:
1. fill the jar 1/3 full of water
2. add several drops of acrylic tempera paint to the water
3. put the lid on your jar and shake well to mix the paint
4. add some glitter to your paint solution and shake some more
5. stretch and elongate a handfull of cotton balls
6. add the stretched cotton balls to the water and push them down to fill the bottom of the jar
7. fill the next 1/3 of the jar with water
8. add several drops of a contrasting tempera paint
9. repeats steps 4-6
10. fill the last 1/3 of the jar with water
11. repeat steps 4-6 againSince lilacs are in bloom at my house, we colored our galaxy to match the flowers. If you have the materials and are so inclined to give this project a try, don't forget to send me a picture and tell me about the colors that you chose.
Week of April 20, 2020
This week's Make-It-Monday project is a great stress relief activity. There are several different recipes that can be used. If possible, try two different recipes so you can compare them and let me know which one you like best. I will share the two recipes that we tried at my house this weekend. There is a more traditional recipe and a new foamy recipe. The traditional recipe feels a litle slimier and makes entertaining designs if you have the patience to let it drip through your fingers or a slotted spoon. At our house, we agreed that the foamy recipe had a better texture and a better smell. Give them a try and let me know what you think.
TRADITIONAL SLIME RECIPE
1/2c glue
1/2c water
1/4c hot water
1/2t borax
food coloring- Mix glue with 1/2c water
- add 2-3 drops of food coloring
- dissolve borax in 1/4 cup of hat water (make sure borax dissolves completely)
- pour borax water into glue mixture
- stir until consistency begins to change and a ball of slime is formed
FOAMY SLIME RECIPE
4c shaving cream
1/2c glue
1/2t baking soda
1T saline solution
food coloring- place 4 cups of shaving cream in a large bowl
- add 2-3 drops of food coloring
- stir in glue, saline solution, and baking soda
- as consistency begins to change, knead the mixture until your are able to form a gooey ball
- note: the mixture is very sticky but will become more manageable the more you knead it--adding a few squirts of shaving cream and a few drops of saline solution may be necessary to reach desired consistency
Previous Week's Projects:
(Monday, April 13, 2020)
Homemade Puffy Sidewalk Paint
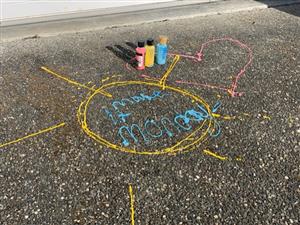
This week's Make-It-Monday project is a simple recipe for homemade puffiy sidewalk paint. I know that some of you have already had fun displaying cheerful artwork on sidewalks and driveways in your neighborhoods. Here is a chance to spread more chear and complete a speech assignment at the same time. There are many variations for the sidewalk paint recipe that can be find with a simple online search. An additional challenge this week could be to pick two different recipes to compare/contrast different aspects of the process such as ease of preparation, successful use of the completed product, and ease of clean-up of materials.
Here is the recipe that my daughters used when I put them to work this week.
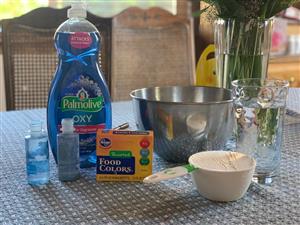
Materials:
1 bowl
1 spoon
several small cups (1 per color of paint you choose to make)
several small dispensers* for squeezing paint (1 per color of paint you choose to use.
*empty condiment containers, empty soap/shampoo bottles, empty craft bottles
Ingredients:
1 cup flour
1 cup water
1 Tablespoon liquid dish soap
5-10 drops food coloring or washable paintDirections:
- In a large mixing bowl stir together the flour and water until there are no lumps
- Stir in the dish soap to the flour mixture
- pour small amounts of the four/soap mixture into small cup(s)
- add 5-10 drops of food coloring to each small cup and mix well
- carefully transfer colored mixture from small cup into empty dispensers
- go outside (with permission) and have fun
I would love to see your masterpieces once you have had a chance to complete the project. You can send a picture of your artwork to me via email, or by uploading to your Google Classroom.
NOTE: This puffy paint does not store well. Be sure to clean all your supplies and materials as soon as you have finished creating.
(Monday, March 30, 2020)
Seed Bombs
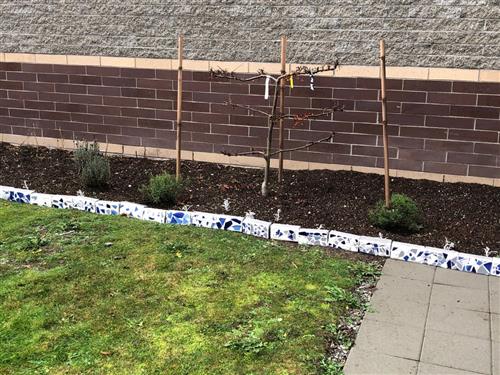
Did you know that there is a Gateway Garden? With the support of the Gateway PTSA and community volunteers, the therapy department is in the process of developing a multi-sensory garden project to be enjoyed all of our Gateway Guardians. Thanks to the donation of materials and labor from the local Mill Creek Lowes, our garden includes a raised garden box on a concrete pad that is accessbility for students with a variety of mobility needs. With the support of a local high school student completing his Eagle Scout project, we have been able to clean the garden space and complete some initial planting. Our Extended Resource Room students worked cooperatively with one of our 8th grade art classes to make the decorative bricks that outline the current garden space, and our Life Skills students have done this week's seed project in class and the seed bombs have been planted in the garden. We hope to enjoy the flowers when we return to school.
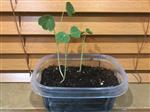
The YouTube video linked here is the sample we used in class. There are many variations of the project available online so feel free to search the internet and find one that works for your family. Once you have completed the project, you may plant it in your own yard, or you may store it in a small paper bag and bring it to school and we will plant it in our Gateway Garden when school is back in session.
Check back next week for another Make It Monday activity. If you have any activities you would like to share, I would love to here about them.
Have Fun--Mrs. Pace

