- Forest View Elementary School
- K-2 Art projects
Platteborze, Sarah
Page Navigation
-
Week 7
Spring Flower Paper Bouquet
When I think about springtime, I immediately think of beautifully blooming flowers sprinkling color everywhere. These paper flower bouquets are just what we all need to brighten up your houses for springtime and use up some scrap paper in the process!
When we were together in the classroom we had discussed shape both organic and geometric as one of our elements of art. This lesson features several different ways to create organic flower shapes beginning with a simple, traced circle, which makes it perfect for our younger artist. All of the bright, punchy flowers are then overlapped and arranged to create a beautiful, layered bouquet that you can enjoy all year long!
I can use the element of shape to create organic flower shapes in my spring bouquet.
Supplies:
Pieces of colored paper (solid, patterned or scrapbook)
White paper
Square piece of colored paper for pot 6x16 (I used brown)
Green paper for stems
Markers
Scissors & glue
Circle tracer
Click HERE to watch the instructional video on how to make your Spring Flower Bouquet
How to Make a Spring Flower Paper Bouquet
Step One:
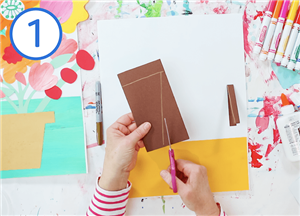
Glue a piece of solid, patterned or scrapbook paper to the bottom of a white piece of paper to make the tablecloth.
Fold a 6″ x 16″ paper in half for the flower pot. Use a marker to draw the flower pot: two horizontal lines on top and a diagonal line that reaches the bottom of the paper. Cut along the outside of your lines to create a symmetrical clay flower pot. Unfold and set aside.
Step Two:
FLOWER #1:
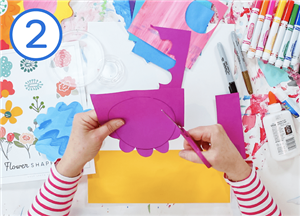
Use a medium-sized circle tracer to make a circle in the center of a piece of painted paper. Use scissors to cut a short, bumpy line around the circle to create your first flower shape. Cut a circle from another color for the center of the flower. Glue the center on and set your flower aside.
Step Three:
FLOWER #2:
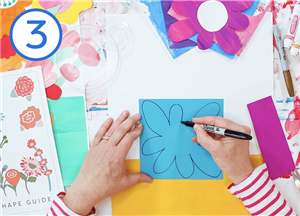
Trace a smaller circle on another piece of painted or colored paper. Use a marker to draw a tall, bumpy line around the circle. The petals of this flower are much longer than the first and will reach almost to the edge of the paper. Cut along the lines. Cut a smaller circle from a contrasting color of paper and glue to the flower. Set your flower aside.
Step Four:
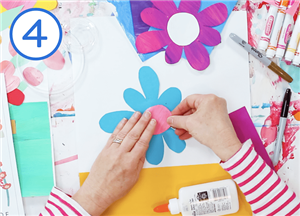
Step Five:
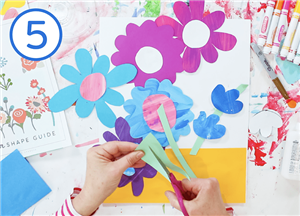
CREATING STEMS & LEAVES
Use green paper to cut long, thin stems for all of your flowers. Don’t be afraid to add in some curved stems; they will help make your bouquet look more realistic than stick straight stems.
Your flowers will overlap quite a bit, so you don’t necessarily need a stem for every flower.
Step Six:
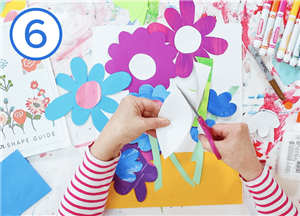
To save time, fold a piece of green paper in half and cut out a leaf shape to make two identical leaves. Use a marker to add veins to your leaves.
Step Seven:
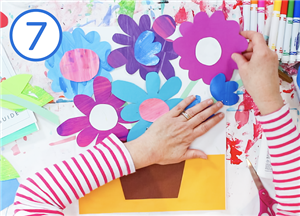
ARRANGE THE FLOWERS AND GLUE IT ALL TOGETHER
Set your pot down on the tablecloth, then add some stems that extend out from the bottom of the pot. Place your flowers on top.
Arrange the flowers until your have a balanced picture that looks good to you. Don’t be afraid to re-arrange a few times until you are really happy with what you have.
Step Eight:
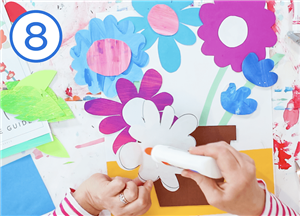
Glue the stems and the pot down first, then add the flowers. Tuck leaves into open spaces to fill up the space. If you have extra flowers, you can add them if there are any bare spots in your bouquet.
Turn your whole paper over and gently rub the back to ensure that all of your flowers are glued on securely.
Step Nine:
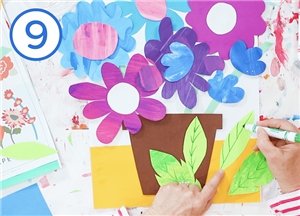
Use markers to add additional lines and shapes to the center of your flowers to really finish them off beautifully.
You can also add some designs to your flower pot and the tablecloth if you’d like.
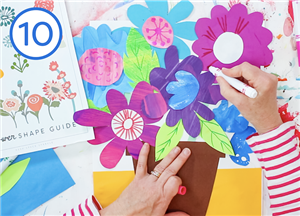
Now your flowers are ready to brighten up your room or home!
Don't forget to email your art teacher Mrs. Russell or Mrs. Platteborze a picture of you and your finished art so we can see what AMAZING work you created. We will then put your picture on our art webpage under ART SHOWCASE. I know everyone misses seeing eachother and our awesome art so this gives us a way to still do that.

